Installation and setup
The Fluendo SDK is available for various operating systems and packaging flavors.
Linux
APT-based distributions
To install using the command line interface, use:
sudo apt install ./fluendo-sdk_x.x.x.x_arch.deb
or
sudo dpkg -i ./fluendo-sdk_x.x.x.x_arch.deb && apt-get install -f
RPM-based distributions
To install using the command line interface, use:
sudo sudo rpm –i fluendo-sdk_x.x.x.x_arch.rpm
or
sudo yum localinstall fluendo-sdk_x.x.x.x_arch.rpm
Environment
The Fluendo SDK is installed at /opt/fluendo-sdk.
In order to build yourself the examples and tutorials, you also need:
meson build system (version >=0.52)
C toolchain: gcc or clang
This software is most likely included with your Linux distribution. Finally, you can test that everything is correct by building an example:
mkdir test && cd test
meson /opt/fluendo-sdk/share/examples/fluendo-sdk/MediaPlayer/
ninja
./MediaPlayer S ohttp://ftp.halifax.rwth-aachen.de/blender/demo/movies/ToS/tears_of_steel_720p.mov q p
Windows
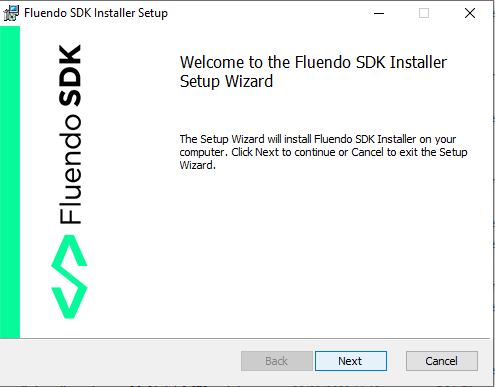
To install, double click on the MSI package and follow the instructions:

Environment
The Fluendo SDK is installed by default at
C:\fluendo-sdk\<version>\<x86/x86_64>. During the installation, the
following environment variables are set:
FLUENDO_SDK_ROOT_X86 if you have installed the 32 bits version of the Fluendo SDK, or
FLUENDO_SDK_ROOT_X86_64 if you have installed the 64 bits version of the Fluendo SDK.
Attention
The installer does not add the runtime DLL path. If you want to add it for your development environment, it is located at FLUENDO_SDK_ROOT_X86_64\bin (64bit) or FLUENDO_SDK_ROOT_X86\bin (32bit).
For example:
PATH = %FLUENDO_SDK_ROOT_X86_64%;%PATH%
To build yourself examples and tutorials, you also need:
meson build system (version >=0.52)
C toolchain: MinGW or Visual Studio
Visual Studio for C# samples
You can install both directly from Python’s pip :
python3 -m pip install meson ninja
Build samples with Microsoft Visual Studio
Open a x86 Native Tools Command Prompt or x64 Native Tools Command Prompt
depending if you have installed the 32 bits or 64 bits version of the Fluendo
SDK. Then go to the samples folder
C:\fluendo-sdk\<version>\<x86/x86_64>\share\samples and enter:
meson build
ninja -C build
Alternatively, you can create a Visual Studio project using:
meson build --backend=vs
This creates a VisualStudio project and solution within the build folder.
To debug or run the samples using VisualStudio auto-generated project, you need to add the Fluendo SDK runtime path to your project:
Open project properties window in VisualStudio (Alt+Enter)
Select Debug entry in the left pane
In Environment property, add
PATHvariable asPATH=$(FLUENDO_SDK_ROOT_X86)\binorPATH=$(FLUENDO_SDK_ROOT_X86_64)\bin, depending if you are configuring a 32 bits or 64 bits project